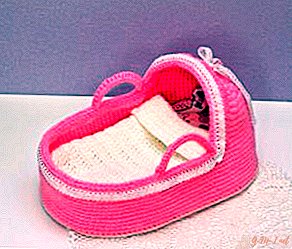
For newborn children, you can crochet or knit a lot of the most diverse and unusual things. They can be warm, cozy and nice. If you like to crochet and want to tie a cute little thing for a newborn, pay attention to the cradle. This is a very interesting solution and parents will definitely like the crumbs, and the crumbs will be convenient in it.

How to crochet a cradle for a newborn
If you know how to crochet or you just have a great desire to learn, then you have great opportunities. With your own hands you can create various unusual things. Knowing how to crochet, you can create everything from hats to cardigans. Knitting for children is a pleasure.
In such clothes the baby will be comfortable and warm. You can choose any pattern. Knits do not go out of fashion. Consider how to crochet a cradle for a newborn - a diagram.

Choose yarn
When choosing yarn, you need to consider what characteristics it should have. Since the cradle should have some, even minimal stiffness, you should choose the appropriate yarn. It is important that it can be washed, and at the same time it does not fade, otherwise after the first wash, you risk spoiling such an unusual creation.

Pay attention to knitted ribbon yarn. It will give the product the necessary stiffness and you will have no problems taking care of it. As for the color scheme - there are no restrictions for your imagination. Experiment and choose the options you like.
Scheme and Description
Suppose we chose ribbon yarn. You will need 6 skeins, as well as a hook suitable for the thickness of the thread size.
IMPORTANT. The number of a suitable hook for the thread is indicated by the manufacturer of the yarn on the package.
To make the bottom of the cradle hard, make its base from plywood. Holes should be made along the entire perimeter at an even distance from each other.
Next, follow the following algorithm:
 Tie the bottom of the RLS product (single crochet).
- Now you need to raise the sides. Knit a new row at the back of the buttonhole of the previous row. According to this scheme, knit in a circle to the desired height of the sides.
- Next, you need to tie a small roof. You can tie it separately, but in the end it will be necessary to connect the parts together.
- For ease of carrying, you can tie the handles. To do this, you need to dial a chain of VP (air loops). Next, tie them with regular columns.
 Tie the bottom of the RLS product (single crochet).
When the product is assembled, its edge can be tied with lace, which can also be tied with a hook.
Leave Your Comment