 For beginners, refueling a sewing machine can seem like a frightening affair. But after you adapt to refuel your machine, you will find that refueling becomes easier each time.
How to insert thread into a sewing machine
A correctly inserted thread is the key to success. If you refuel incorrectly, it will break, and may also damage the fabric. Therefore, follow the instructions to avoid unpleasant consequences and to be able to correctly insert the thread into the sewing machine.
Top half refueling
If your machine has a circuit, you can check it to see where the bobbin pin is located and in which direction the fiber should go.
On a note! The spool will be more stable if you position it so that the thread comes out from under the spool when you look at it from top to bottom.

- Place the spool of thread on the spool pin. The spool is installed on the right side of the machine. This is more of two contacts in this part. Place the fiber on the spool pin and pull some of this fiber out of it.
- Pull the thread through the thread guide at the top of the machine. It looks like a silver piece sticking out from above.
- Be sure to pull around the back of the guide and toward the front where the U-shaped area for the next thread is located.
- Most likely, an instruction will be printed at the top showing how to stretch the fiber through this area.
- Follow the signs on the sewing machine, pulling the thread through the guide toward you. You will loop it around the tension discs at the bottom, and then back up up and through the second thread guide. All this will eventually create a long, narrow U-shape with your thread.
- Wrap it around the take-up lever. After you have completed the U-shape, you will need to wind the fiber around the take-up lever at the top, and then back down to the needle. The gripping lever is a metal part protruding from the 2nd thread guide. At this metal part, a hole will be cut near the top through which the thread can pass.
- Pull the thread back down towards the machine in the direction of the needle. Pass the needle through the small eye of the needle and extend a few inches of fiber from the other side. Then pull it through the slot in the small metal presser foot directly below it.
The upper half is now tucked in and you just need to fill the lower half before you can use the machine
Filling the bottom of the machine
Remove the cover in the lower compartment. The bobbin case is located under the small overlap, which is either directly under the needle or on the side of it. Look for this camera and open it. This will show the bobbin case in which you will need to put the bobbin thread with thread.

Important! The compartment cover should be easy to remove.
On some machines, the bobbin case also has a small cover. Check that you have removed it also so that the slot for your bobbin appears.
Follow the instructions below:
- Unwind a few inches from the bobbin. Before placing the bobbin in its compartment, pull the end of the thread to unwind a few inches from the bobbin. This will be enough to catch when turning the flywheel.
- Make sure you spin enough threads. A few inches is usually a lot, but if you unwind too little, the thread may not catch.
- Place the bobbin in the compartment under the needle. Check the diagram on the bobbin case to see in which direction your fiber should move. Place the bobbin in the slot so that the fiber runs in the direction indicated in the diagram.
- You must pull the thread to the right so that the fiber unwinds quite easily.
- Close the compartment when the bobbin is in place. Be sure to replace the bobbin case cover.
- The bobbin thread is all hidden under the plate under the needle. To highlight its end, take a round disc or wheel on the right side. Turn it towards yourself several times, and the thread tip should pop out. Take it and pull it so that a few inches appear.
- If it does not catch, inspect the compartment to check if the thread is moving in the right direction and make sure that the thread moves easily when you pull it. If this does not happen, it may be full and you may need to unwind part of the thread.
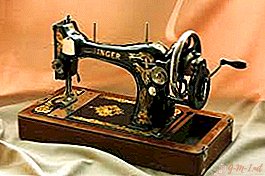
How to refuel an old sewing machine
Many have been familiar with the old machine since childhood, but if you forgot how to thread the thread in such a bobbin, follow the instructions.
 Place the spool of thread on the spool pin.
- Put the spool holder / cap firmly on the spool rim to prevent the fiber from tangling.
- Press the bobbin winder pin to the far left if it is not already there.
- Pass the thread from the bobbin through the thread guide.
- Pass the end of the thread from the inside through a small hole in the bobbin rim.
- Place the bobbin on the pin.
- Press the bobbin winder pin to the right. This will stop the movement of the needle.
- While holding the end of the thread, press the speed control to start the machine until the required amount of thread is wound. (Winding stops automatically after filling up the bobbin).
- Cut the thread; push the bobbin to the left and remove it from the bobbin winder pin.
- Cut the fiber from the end of the bobbin.
 Place the spool of thread on the spool pin.
How to avoid refueling errors
For best results, follow these helpful tips and you will soon be sewing like a pro.
 Always thoroughly clean and lubricate the machine before starting the machine.
- Use high-quality fiber to avoid lint in the machine.
- Change the needle of the sewing machine regularly.
 Always thoroughly clean and lubricate the machine before starting the machine.
To begin with, clearly follow the instructions provided, and after a few refills you can handle the thread without a hint.
Leave Your Comment